Hallöchen ihr Lieben,
seitdem ich in mein Appartment gezogen bin, habe ich mir vorgenommen, etwas für meine Wände zu basteln. Ich habe hohe Decken, deshalb sind meine Wände ziemlich groß und bislang Weiss und langweilig. Auf weheartit habe ich mich dann inspirieren lassen und mich dazu entschieden ein Hänge-Tumblr-Foto-Dings
zu machen (fragt mich nicht wie man so etwas nennen soll hahah). Außerdem habe ich mir noch ein Gitter gebastelt, an dem man Bilder dran pinnen kann. Die einzelnen Schritte findest du jetzt hier! Viel Spaß ♥ (übrigens sind alle ausgedruckten Bilder auch von weheartit. Nur wenige sind selbst gemacht)
zu machen (fragt mich nicht wie man so etwas nennen soll hahah). Außerdem habe ich mir noch ein Gitter gebastelt, an dem man Bilder dran pinnen kann. Die einzelnen Schritte findest du jetzt hier! Viel Spaß ♥ (übrigens sind alle ausgedruckten Bilder auch von weheartit. Nur wenige sind selbst gemacht)
---
//Good evening guys!
Since I live in my own appartment, I always wanted to create something for my walls. They are big, white and absolutely boring. So I decided to get inspired by weheartit (if you want to follow me, my name is vanessaworth1). A few days ago I finally did it, I created my own tumblr-photo-interior-thing (don't know how to call it hahah) and I thought it would be great to share the single steps with you. Let's start! (Btw the photos I used are also from weheartit, just three pics are selfmade. ♥)
----
Let's start with the first DIY! :)
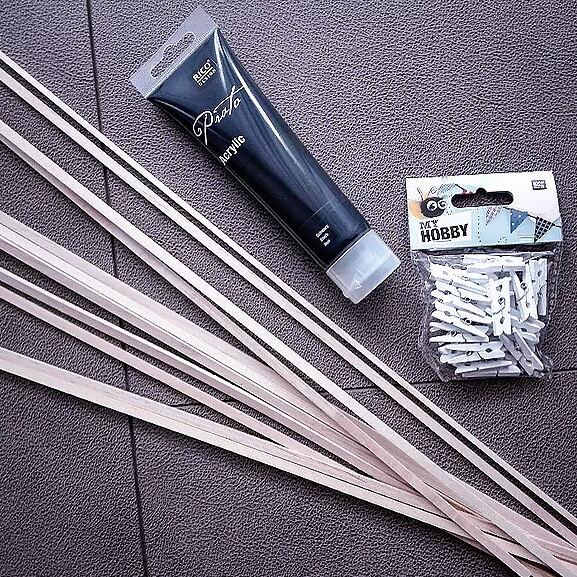
Holzstäbe, schwarze Farbe, kleine Wäscheklammern und Kleber
----
Wooden bars, black color, small-clothes pegs and glue

Bemale die Holzstäbe mit der schwarzen Farbe und lasse diese gründlich trocknen. Wenn das erledigt ist, brauchst du die Stäbe nur noch zu einem Gitter zusammen kleben und schon kannst du mit deinen Wäscheklammern Bilder dran aufhängen! Super einfach & total cool, oder nicht? :)
---
Just paint the wooden bars black. If they are completely dry, glue them together into a grid. Now you can put your photos on it - just use the clothes pegs. So easy, but really cool, isn't it?
_______________________________________
WHAT YOU NEED FOR THE WALL-PHOTO-THING / WAS DU FÜR DAS WAND-FOTO-DING BRAUCHST:

Einen dicken Holzbalken, 2x Papier, schwarzes Band, schwarze Farbe & Stoff eurer Wahl
----
Thick wooden bar, paper 2x, a scissors, black belt, black colour and fabric

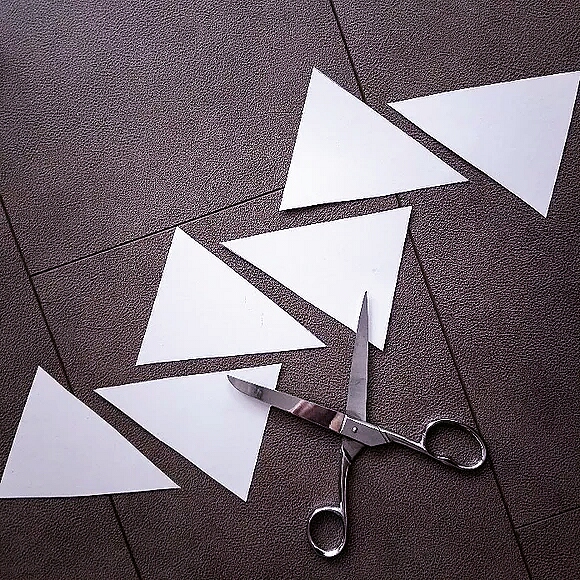
Schneide sechs gleich große Dreiecke aus Papier aus. Wir benötigen gleich immer zwei Papierdreiecke für ein Stoffdreieck. Male deinen Holzbalken danach schwarz an.
----
Cut out 6 triangles in the same size. We need two paper-triangles for one fabric-triangle. Moreover paint your wooden bar black.

Klebe zwei Papierdreiecke auf ein Stoffdreieck. Davon benötigst du drei und diese sollten größer sein als die Papierdreiecke.
----
Glue two paper-triangles on one fabric triangle. The fabric triangle should be bigger then the paper ones.

Klappe den überschüssigen Stoffrand um und klebe ihn fest. Anschließend muss das ganze trocknen.
----
Flap the excess fabric and glue it. Let it dry now.

Abschließend klebe deine Bilder und die Dreiecke an drei Bänder und knote diese an deinen Holzbalken. Fertig! ♥ Hoffentlich hat dir mein DIY gefallen und du besuchst meinen Blog bald wieder!
---
Finally glue the photos and the triangles on three stripes of your belt and knot it to the wooden bar. Finish! ♥ Hope you liked my DIY and we see us again here on my blog! :)
WITH ♡ NESS

Keine Kommentare